Your cart is empty
Subtotal:$0.00 USD
Loading...
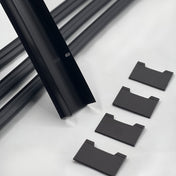
Corner Seal 4 Pack - Bronze
Door Weatherproofing Kit - Bronze
Fast shipping
In-stock items typically arrive in 2-4 days
Easy returns
Hassle free returns policy
Door glass experts
Talk to a real person