Adding Door Glass
-
First, be sure your door is made of either steel or fiberglass. If you have a wood door, you may experience many more variables than shown in this guide. To get help with a wood door, it may help contacting a Zabitat sales representative.
Steel doors are metal on the outside with an insulated core. If a magnet sticks to the door, it is a steel door.
Fiberglass doors are a composite material on the outside with an insulated core, and can be smooth or have a wood grain texture to resemble wood doors.
-
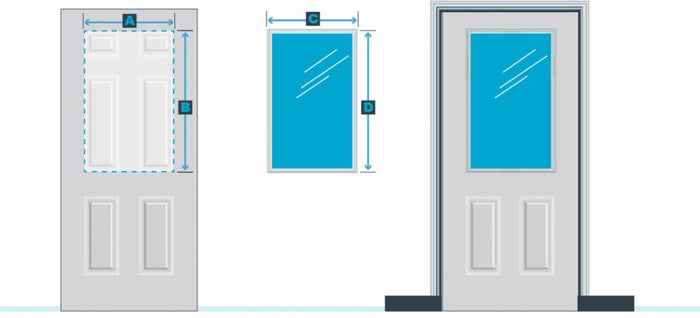
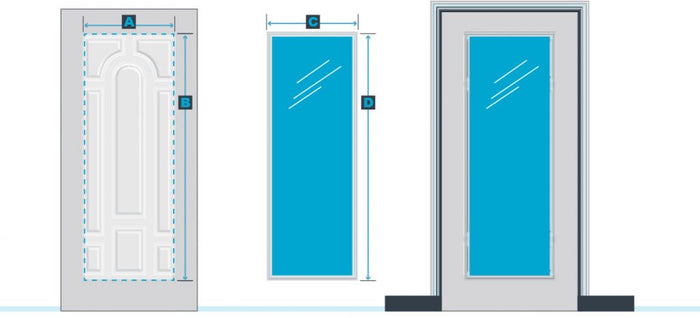
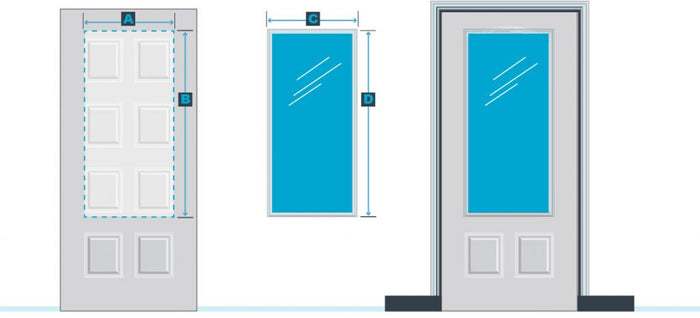
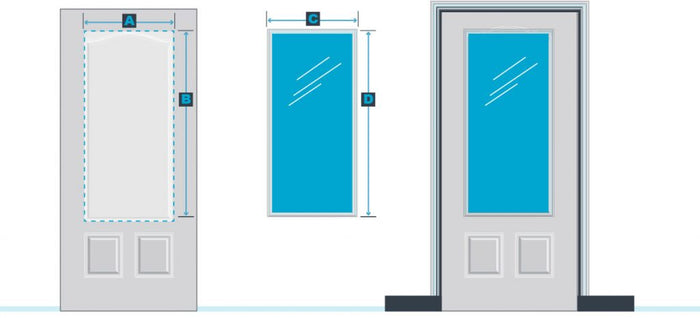
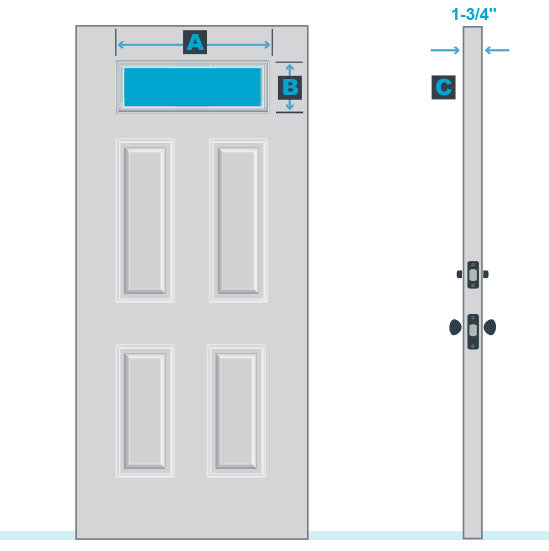
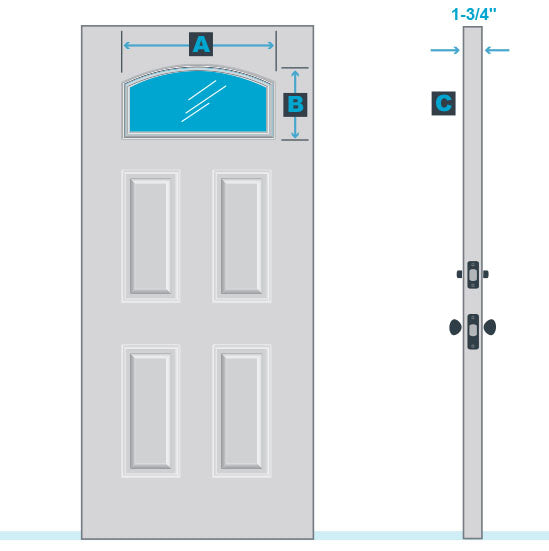
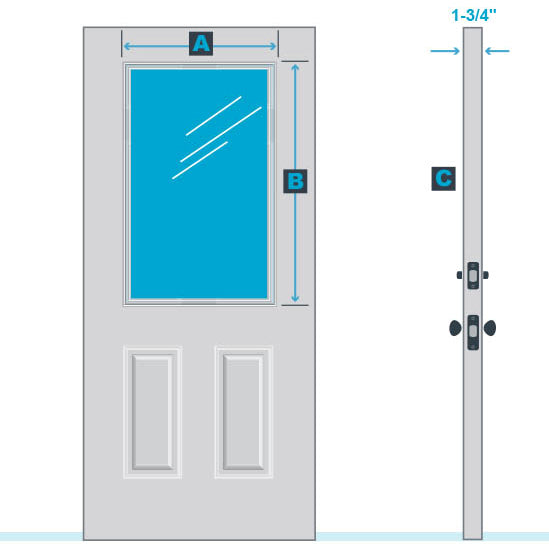
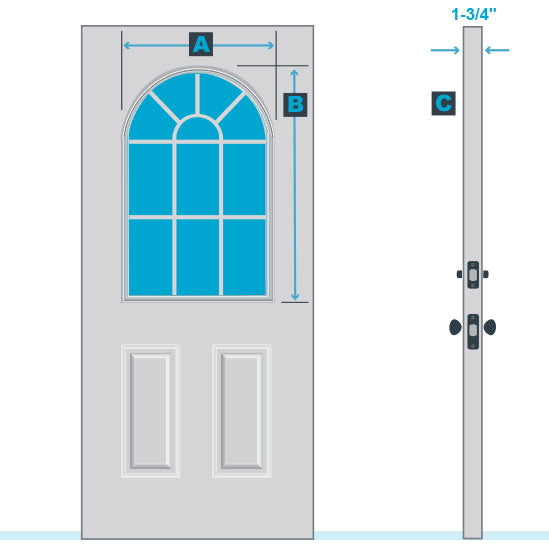
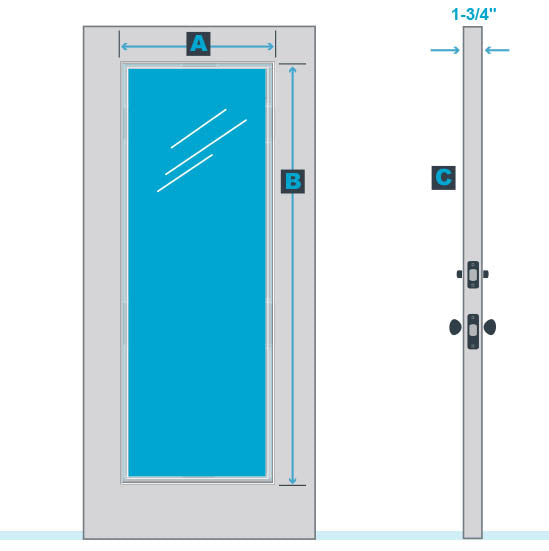
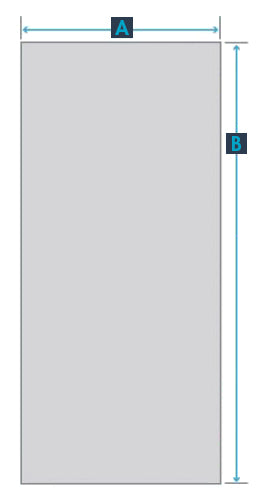
Dimension A: Measure the door panel embossment from outside edge to outside edge, horizontally left to right.
Dimension B: Measure the door panel embossment from outside edge to outside edge, vertically top to bottom.
Dimension C & D: The horizontal and vertical measurement of the Door Glass Frame Kit intended for use in the door shown.
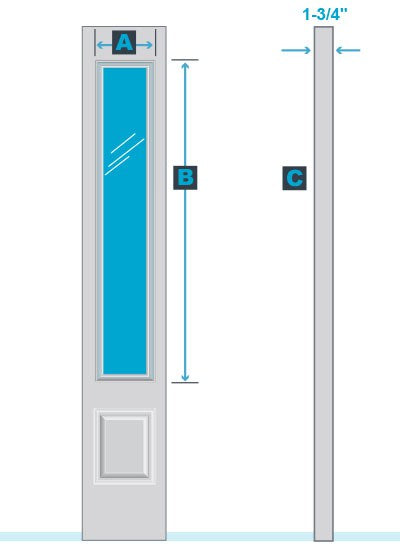
Door Thickness: The thickness of your door should be 1¾”.
-
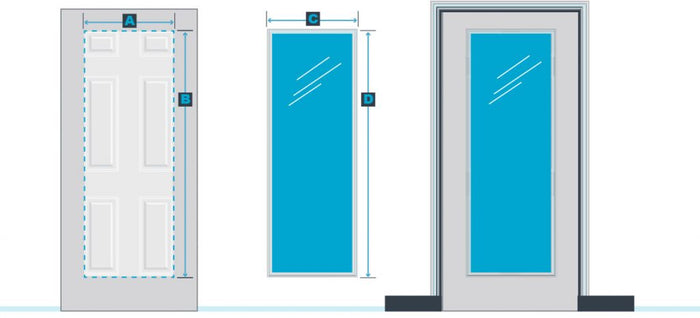
6-panel to Full Light
For 30" wide doors:
Expected Embossment Dimensions (A x B) 21" x 65"
Recommended Glass Insert (C x D) 22" x 66" door glass frame kitFor 32" and 36" wide doors:
Expected Embossment Dimensions (A x B) 23" x 65"
Recommended Glass Insert (C x D) 24" x 66" door glass frame kit -
6-panel to Half Light
For 30" wide doors:
Expected Embossment Dimensions (A x B) 21" x 37"
Recommended Glass Insert (C x D) 22" x 38" door glass frame kitFor 32" and 36" wide doors:
Expected Embossment Dimensions (A x B) 23" x 37"
Recommended Glass Insert (C x D) 24" x 38" door glass frame kit


-
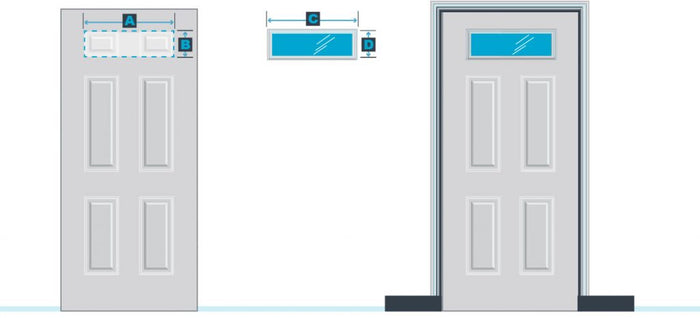
6-panel to Top Light
Expected Embossment Dimensions (A x B) 23" x 7"
Recommended Glass Insert (C x D) 24" x 12" door glass frame kit -
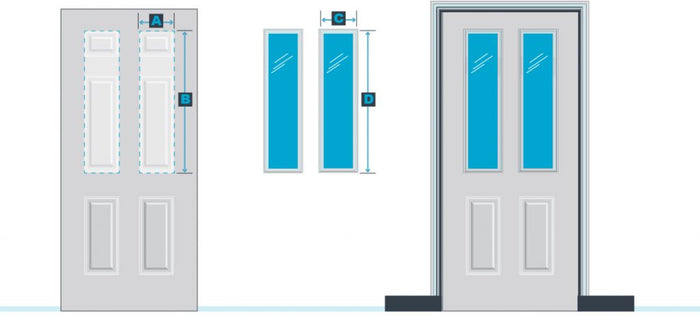
6-panel to Twin Half Lights
Expected Embossment Dimensions (A x B) 9" x 37"
Recommended Glass Insert (C x D) 2, 10" x 38" door glass frame kits


-

8-panel to Full Light
Expected Embossment Dimensions (A x B) 23" x 65"
Recommended Glass Insert (C x D) 24" x 66" door glass frame kit

-
8-panel center arch to Full Light
Expected Embossment Dimensions (A x B) 23" x 65"
Recommended Glass Insert (C x D) 24" x 66" door glass frame kits -
8-panel to ¾ Light
Expected Embossment Dimensions (A x B) 23" x 49"
Recommended Glass Insert (C x D) 24" x 50" door glass frame kit


-

9-panel to Full Light
Expected Embossment Dimensions (A x B) 23" x 65"
Recommended Glass Insert (C x D) 24" x 66" door glass frame kits -
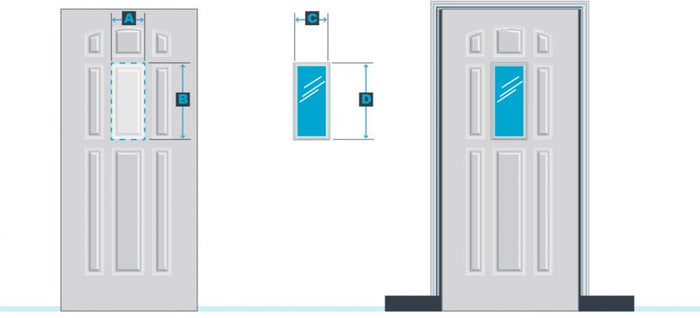
9-panel to Center Light
Expected Embossment Dimensions (A x B) 8.5" x 19.5"
Recommended Glass Insert (C x D) 9.5" x 20.5" door glass frame kit


-
3-panel Arch Top to ¾ Light
Expected Embossment Dimensions (A x B) 23" x 49"
Recommended Glass Insert (C x D) 24" x 50" door glass frame kit -

3-panel Arch Top to Full Light
Expected Embossment Dimensions (A x B) 23" x 65"
Recommended Glass Insert (C x D) 24" x 66" door glass frame kit


Replacing Door Glass
-
First, be sure your door is made of either steel or fiberglass. If you have a wood door, you may experience many more variables than shown in this guide. To get help with a wood door, it may help contacting a Zabitat sales representative.
Steel doors are metal on the outside with an insulated core. If a magnet sticks to the door, it is a steel door.
Fiberglass doors are a composite material on the outside with an insulated core, and can be smooth or have a wood grain texture to resemble wood doors.
-
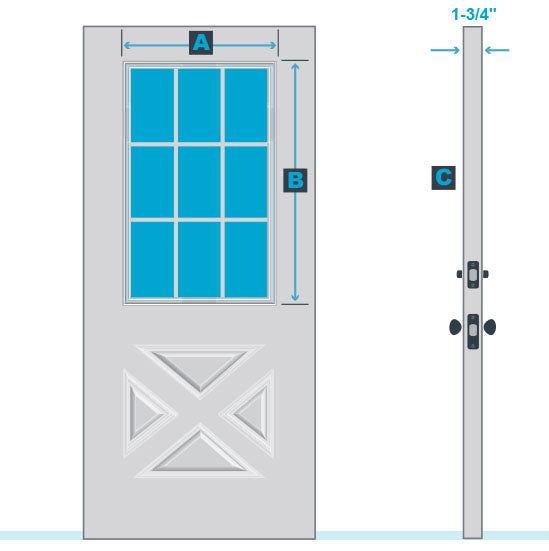
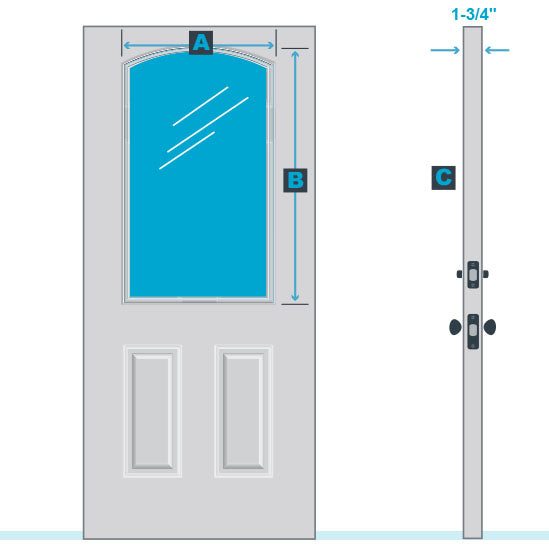
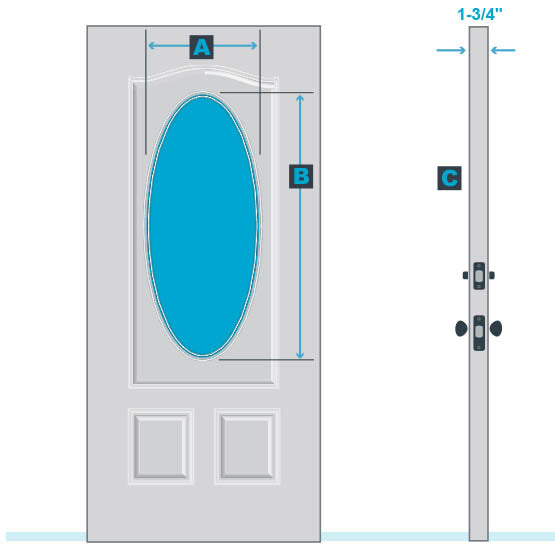
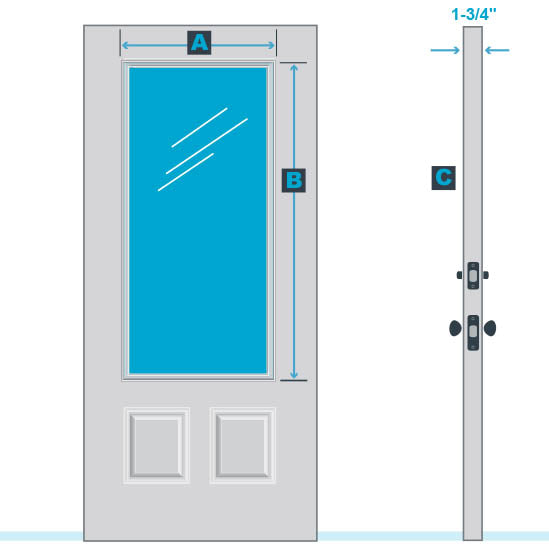
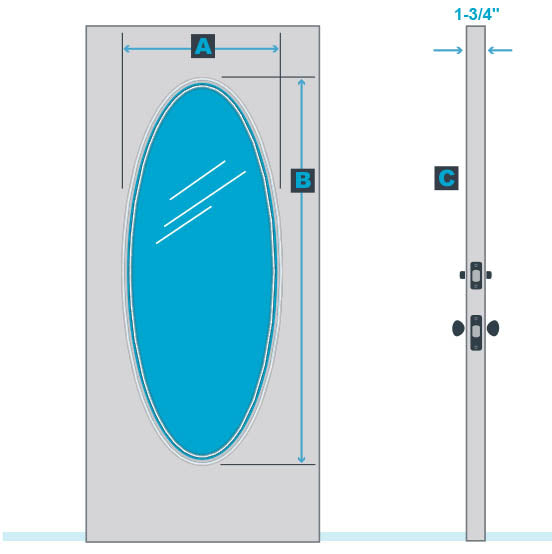
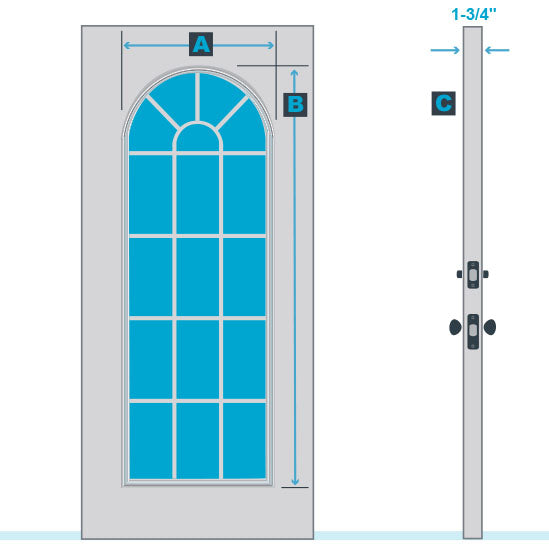
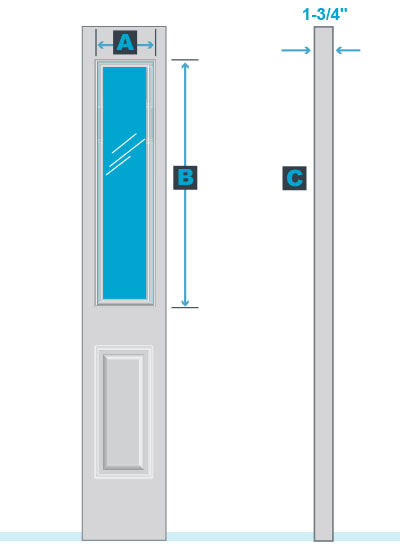
Dimension A: Measure the raised molding surrounding the existing glass from outside edge to outside edge, horizontally left to right.
Dimension B: Measure the raised molding surrounding the existing glass from outside edge to outside edge, vertically top to bottom.
Dimension C: Measure the thickness of the door, the door thickness should be approximately 1¾”.
-
Top Light
Available Sizes:
-

Sunburst
Available Sizes:
23.797" x 11.813" -
Camber Top
Available Sizes:
24" x 12" -

3-panel Craftsman
Available Sizes:
27" x 17.25"
24" x 17.25"
23.3" x 18"


-

2-panel Craftsman
Available Sizes:
27" x 17.25"
24" x 17.25"
23.3" x 18" -
Half Light w/ Grille
Available Sizes:
22" x 38"
24" x 38" -
Half Light Arch Top
Available Sizes:
24" x 40"


-
Half Light Round Top
Available Sizes:
24" x 38" -
Arch Top Medium Oval
Available Sizes:
18" x 41.9" -
Medium Oval
Available Sizes:
18" x 41.9" -
¾ Light
Available Sizes:
24" x 50"


-
Full Light
Available Sizes:
22" x 66"
24" x 66" -
Full Oval
Available Sizes:
24" x 59.875" -
Full Light Round Top
Available Sizes:
24" x 66"


-
Half Sidelight
Available Sizes:
10" x 38" -
¾ Sidelight
Available Sizes:
10" x 50" -
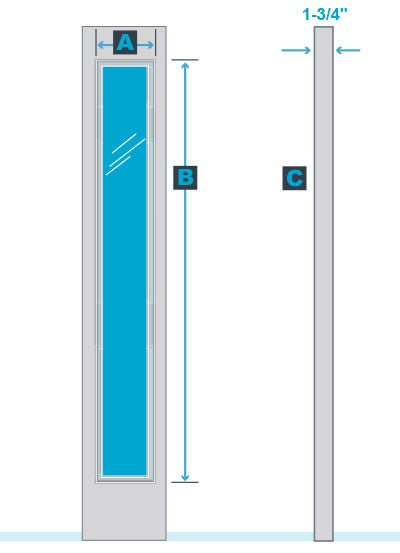
Full Sidelight
Available Sizes:
9" x 66"
10" x 66"


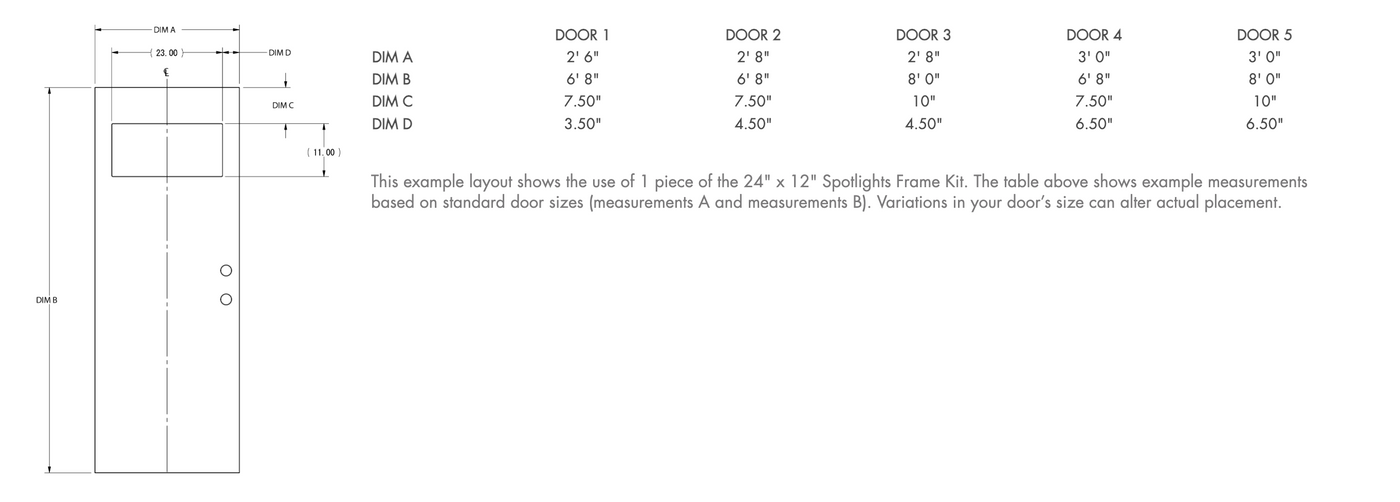
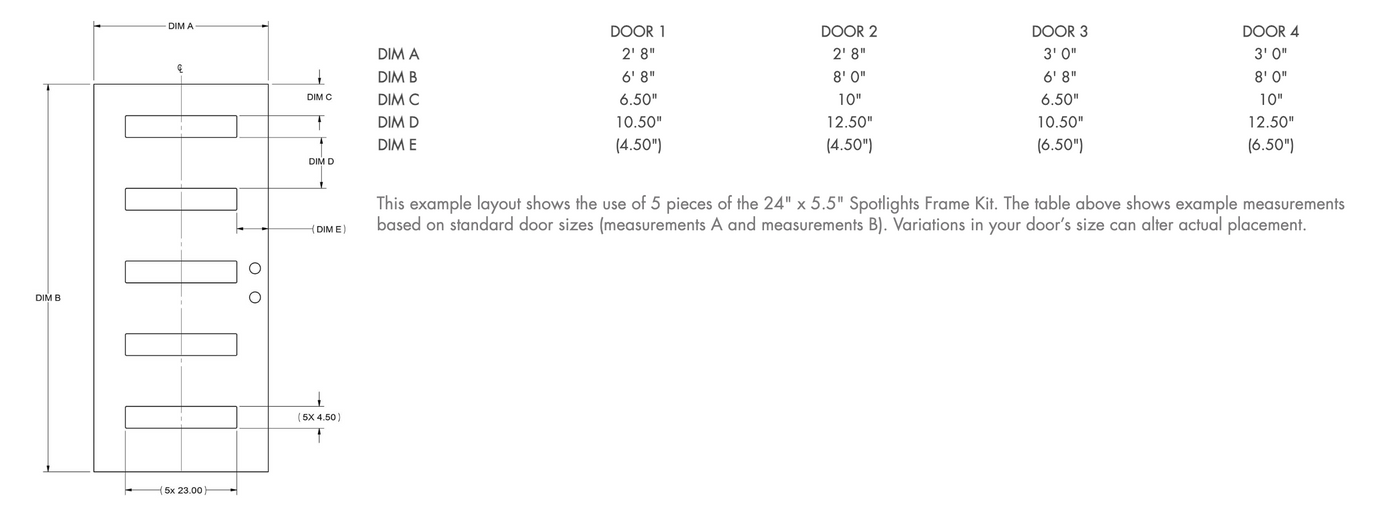
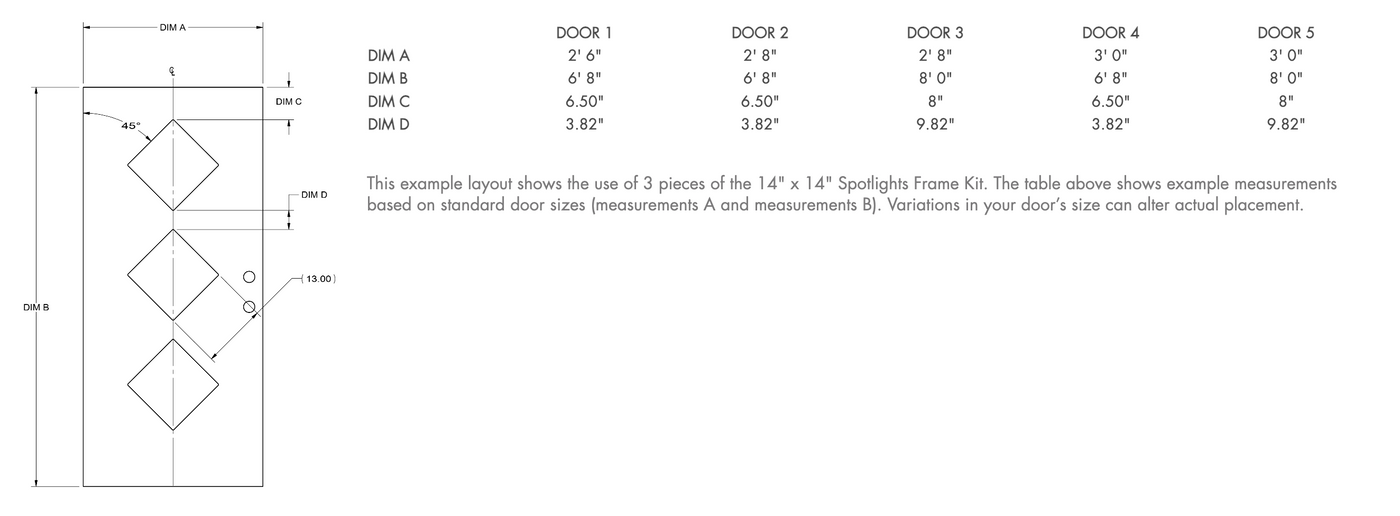
1. Door Measurements
-
-
Measurement A. Door Width
You’ll first want to find the width of your door slab. This measurement does not include the frame jamb, which is attached to the door. The best way to get this measurement is to open your door so you can get to the very edges of the door slab that normally would rest against the door jamb. Make sure to measure the width of your door at various heights because some doors may be slightly wider at the top of the door than they are at the bottom of the door (or vis-versa). Keep this in mind when marking your Spotlights cut-out area.
Measurement B. Door Height
Then you’ll want to find the height of your door slab. This measurement does not include the frame jamb, which is attached to the door. It is also best to open your door so you can get to the very top and bottom edges of the door slab that normally would rest against the door jamb. Make sure to measure the heigh of your door at various widths because some doors may be slightly taller on the left side of the door than it is on the right side (or vis-versa). Keep this in mind when marking your Spotlights cut-out area.