-
Glass Types
Door Glass Inserts can come in several different pane options. The number of glass panes can effect the energy efficiency of the glass and also the noise cancelation. Glass inserts are available in single pane, double pane, and even triple pane. Not all pane options are available for all glass inserts and will vary based on design properties.
Low-E Door Glass has an invisible film on the panes that provides additional energy efficiency. The film reflects radiant heat, which helps prevent heat transfer through the glass. This increases energy efficiency of the glass.
Laminated Glass is a Double Pane glass that has been melted together with laminate in-between the layers. This creates a much stronger unit than traditional glass which prevents objects from breaking through the glass. We call this Impact Resistant Glass or Severe Weather Glass. This is the same style of glass used in car windshields.
-
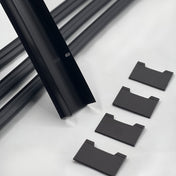
Glass Caming
Caming in door glass is referencing the metal work the joins together the different smaller glass pieces within the glass. Within the glass insert, there are smaller glass pieces that very in texture, color, and design. The caming holds all these different pieces together to form the glass.
Caming finishes are an important consideration as they contribute heavily on the overall look and visual appearance of the glass. Different caming options are available for different designs. That way you can select a finish that matches the overall look and accessories of your home or entryway.


Adding Door Glass
Replacing Door Glass

1. Prepare the Exterior Door
Prepare the exterior door by removing the door from the hinges. Remove the handleset from the door. Lay the door down across the sawhorses.
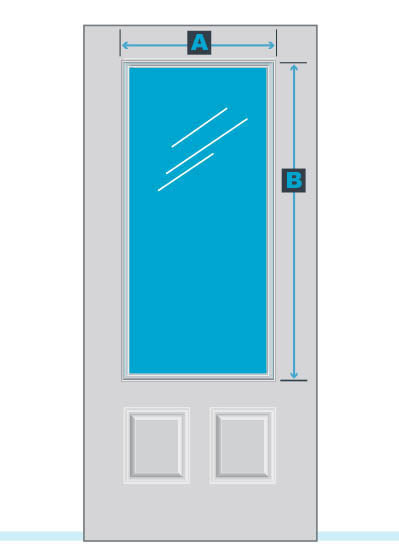
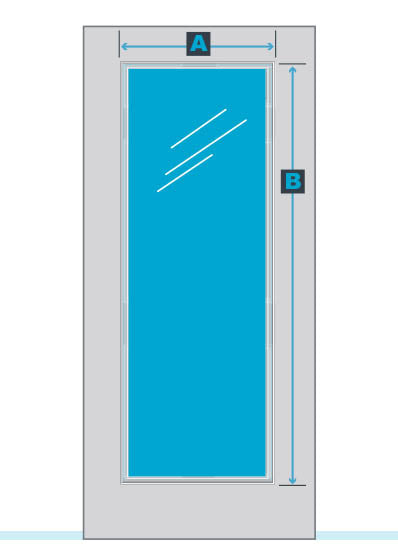
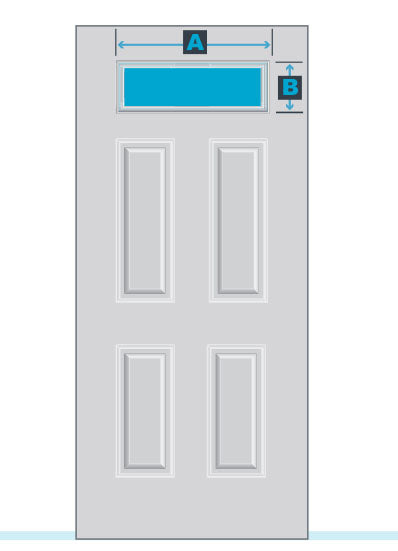
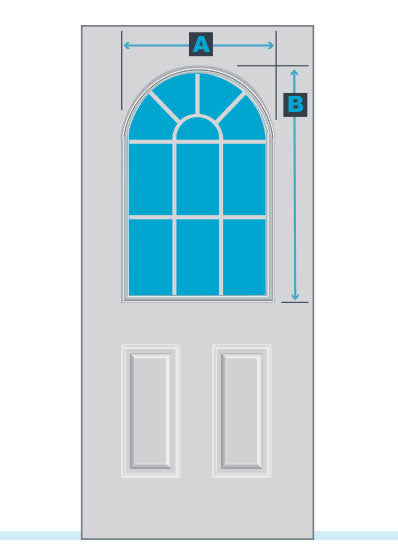
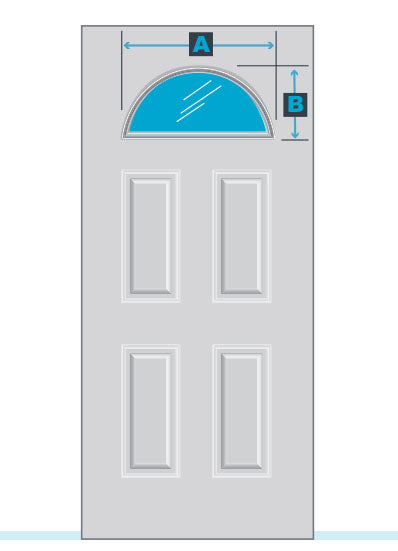
2. Measure the Exterior Door
Measure the exterior door (Refer to the measurement guide). Measure and mark the cutting area on the front side of the door. If your door is flush (no embossments), measure corner to corner of the cutout marking to make sure the opening is square.

3. Mark the Cutting Area
Mark the glass area by applying painter’s tape around the cutting area where the door glass will be inserted, to prevent damage while cutting.

4. Cut the Hole for the Door Glass
Cut the hole for the door glass by drilling a 3/8″ or 1/2″ starter hole in all 4 corners of the measurement.
NOTE: Do not attempt to cut all the way through the door.The up-stroke should not leave the door and the down-stroke should not exceed 1″ into the door. Using the starter hole, insert jig saw with a short stroke blade into the inner core of the door and cut along marked guidelines, corner to corner. You will be cutting through material of a different density near the lock, so you will feel slightly more resistance.
-
5. Flip and Repeat
Flip the door over and repeat Steps 2-4 for the back side of the door.
6. Remove Tape & Debris
Remove tape and debris, then remove all packaging from the door glass kit. Separate the inner frame from the outer frame with glass.

7. Install the New Glass
Install the new glass by lifting the door off of the sawhorses and lay the outer frame with glass over the sawhorses. TIP: To ensure that the glass is correctly installed the temper stamp should appear on the bottom of the door.Carefully lay the door over the door glass. To properly distribute the weight of the door glass, place the bottom edge of the door opening snugly to bottom of the door glass.

8. Attach Interior Frame
Attach the interior frame by placing interior frame with exposed screw holes over the inside of the door. Align the frames by matching the screw hole guides. Insert each screw working from side to side. Tighten firmly so that the frame fits snugly against the door and the seal is compressed.TIP: Avoid over tightening the screws.
-
9. Insert Screen Hole Covers
Insert screw plugs by aligning the screw plugs with the frame profile. Insert and tap each plug into place.
10. Reinstall the Door
Reinstall the door by placing the door back on its hinges. Use standard window cleaner to make your new door glass shine!